You want it! You need it! You crave it! Not that, silly: I’m talking about unlocking the secret to making Chocolate Peanut Butter Cups the simple, stress-free way! These are every bit as good as Reese’s Peanut Butter Cups, except that you get to make them! You’ll find similar knock-off recipes for this product elsewhere on the Internet - but trust me, Dollinks, my recipe’s far easier than the rest. Because this was my first time, I was nervous (I’ve already told you - not that!). But then I thought … if I did this instead of that, the recipe would be faster and less complicated.
Regular readers already know I like kitchen gadgets that make jobs faster and simpler. I’d planned to make these Chocolate Peanut Butter Cups in a small, heritage, metal mini-tart pan my late mother-in-law gave me decades ago. I’ve extracted - and broken - many tart shells from that pan. so it was time to try something new. That’s why I treated myself to a flexible silicone mini-tart pan - about $15 in most cooking stores. That small move made a big difference to the success of this recipe. Because silicone safely withstands extreme heat and cold, my new “pan” (technically, a silicone “form”) went directly from the microwave to the fridge to the dishwasher.
Silicone is flexible and metal pans aren’t: My Chocolate Peanut Butter Cups popped out without breaking. I know my mini-tarts will do the same, from now on. But that wasn’t the only step I took to simplify this recipe. Rather than tell you how other cooks make this treat, let me tell you how I made it - and how utterly delicious it was! To use my method, a silicone mini-tart pan is a must.
Chocolate Peanut Butter Cups:
30 mini-tart paper liners (optional)
90 milk chocolate melting wafers (about 1-¼ c.), divided
¾ c. creamy-style peanut butter (not the “natural” kind)
¼ c. + 2 tbsp. icing sugar (“confectioners” sugar)
Dash of salt
How to Prepare the Exterior of the Chocolate Cups:
Trim paper liners to about ⅜-in. from the bottom, so the tops of the trimmed liners are flush with the top of the mini-tart indentations in your silicone mini-tart form.
 |
| Trim paper liners to fit silicone mini-tart pan |
Place a couple of milk chocolate melting wafers in each of six mini-paper liners in pan indentation (see two Notes).
 |
| These are the milk chocolate melting wafers or "discs" |
 |
| Melt a couple of wafers for base and sides of each cup |
 |
| Flatten base and coat sides with small ladle |
 |
| If needed, remove paper from silicone form to coat thoroughly |
Microwave chocolate-coated liners inside silicone sheet at half-power for 45 sec. to 1 min., until partially melted. Using a small ladle with a rounded bottom, work the chocolate up (but not over) the sides of each paper cup, ensuring that you leave room for the peanut butter filling and chocolate topping. Be thorough as you coat each of the liner’s ridges with melted chocolate: When you eventually peel the liner off, only the chocolate form will remain. With the six chocolate-coated liners inside, refrigerate the silicone form 10 min., allowing the chocolate forms to harden. Remove chocolate forms from silicone. Store in fridge as you repeat the process, working with six more liners at a time, until you’ve coated 30 paper liners and used 60 of the melting wafers. Refrigerate all for 10 min.
How to Prepare the Peanut Butter Filling:
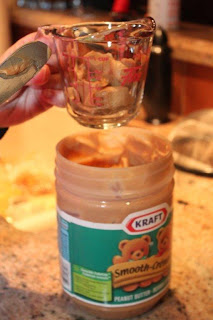
In a 1 c. microwave-safe glass measuring cup, combine peanut butter, icing sugar, and salt. Microwave on full power about 45 sec. Stir to remove any lumps. Carefully pour about 2 tsp. of sweetened peanut butter into each chocolate form, leaving room for the top layer of chocolate. Refrigerate peanut butter-filled cup 45 min., until peanut butter firms up. When centers have hardened, peel away paper. Return peanut butter cups to fridge to maintain their firmness.
 |
| Measure and sweeten peanut butter |
 |
| Pour sweetened peanut butter into chocolate cups |
How to Prepare the Chocolate Topping:
With microwave oven on half-power, partially melt remaining milk chocolate melting wafers for 40 to 45 sec. in microwave-proof glass measuring cup. Stir until completely melted. Pour ½ to 1 tsp. over hardened peanut butter inside each of five or six peanut butter cups. Smooth and spread with the back of a teaspoon, continuing until all the peanut butter cups are topped with chocolate. Refrigerate Chocolate Peanut Butter Cups 10 min. to ensure chocolate topping firms up before serving.
 |
| Top each cup with chocolate ... |
 |
| ... before firming in refrigerator |
Note: The chocolate should be warm when you spread it over the paper. For this reason, don’t work with any more than six chocolate-filled paper liners at a time. When you use a silicone mini-tart pan, you may be tempted to eliminate the paper liners. With no liners to trim or peel away, you’ll cut 15 minutes from the time this recipe requires. Resist that temptation. It’s far easier to spread the warm chocolate evenly on a paper liner than in a silicone indentation. Paper liners also replicate the ridges on Reese’s delicious peanut butter cups. Makes 30.
Note: These cups are shallower than the commercial type, allowing a treat with fewer calories. To make deeper cups, cut the paper 3/8-in. above the silicone form, making 15 to 20 cups, rather than 30.
I must dash! Here come the adorable trick-or-treaters ... no chocolate for these little guys!
Note: These cups are shallower than the commercial type, allowing a treat with fewer calories. To make deeper cups, cut the paper 3/8-in. above the silicone form, making 15 to 20 cups, rather than 30.
I must dash! Here come the adorable trick-or-treaters ... no chocolate for these little guys!
