
These excellent breadsticks are very easy to make!
Cheddar-Poppy Seed Breadsticks:
1 c. (250 mL) hot milk (about 120 deg. F or 50 deg. C)
1/4 c. (60 mL) vegetable shortening, room temperature
1 tbsp. (15 mL) granulated sugar
1 tsp. (5 mL) salt (do not reduce)
2-1/2 c. (625 mL) all-purpose flour (see Note)
One 0.2-oz. (8 g) pkg active, granular quick-rise yeast (pkg equals 1 scant tbsp.)
1/2 c. (125 mL) grated extra-aged, sharp cheddar cheese
1 egg, beaten
2 tbsp. (30 mL) water
1-1/2 tbsp. (22 mL) poppy seeds or sesame seeds
Preheat oven to 300 deg. F. In a medium bowl, combine heated milk, shortening, sugar, and salt. Set bowl aside (Mixture will cool slightly as you combine dry ingredients; most of shortening will remain unmelted). In a large bowl, combine flour, yeast, and cheddar. Add milk mixture all at once, stirring with hands until well combined.
Knead 2-to-3 min. in lightly floured work bowl until mixture forms a smooth, shiny, elastic ball. Allow dough to rest 10 min., lightly covered with a piece of parchment (Allow yourself to rest, too. Entré vous et moi, I knocked back a beer).
Slice dough into four equal portions with a lightly floured knife. Roll each portion out to roughly 9-x-9 in. Slice each portion into 9 equal pieces (see Obsessive-Compulsive Note). Leave them flat or give them a little roll or twist. Transfer to parchment-lined baking sheets (see “Wow, You’re Smart!” Note).
In a small bowl, whisk together egg and water. Using a pastry brush, dab each breadstick lightly and quickly with egg mixture. Using a shaker bottle, sprinkle with poppy or sesame seeds. Lightly cover unbaked breadsticks with parchment paper. Allow to rest 30 min. Bake 40 min. or until golden. Immediately transfer to wire racks so sticks will not soften. Makes approximately 3 dozen.
Note: I use unbleached flour because I prefer its taste for bread-making, but bleached flour is also fine.
Obsessive-Compulsive Note: Ron poked his nose into the kitchen as I carefully measured and squared up the dough. “Too bad you don’t have a micrometer,” he said. “Then you could measure its thickness! You won’t worry so much about the length of those breadsticks after you’ve had a couple of bites!”
This immediately made me laugh. All my careful measuring was ridiculous. Slice the dough approximately 1 in. (2.54 cm) wide and what you feel is just long enough, but don’t fuss. Once I stopped measuring, I realized how beautiful my “artisan-style” breadsticks really were. Perfection is not always a desired quality in baking. Celebrate that you made these breadsticks yourself! They shouldn’t look like they came from a factory.
 |
P-h-h-h-t! |
your fingers and transfer it to a baking sheet without stretching it. The very best tool for flouring work surfaces and utensils is a small plastic squeeze bottle. One ph-h-h-t! and you’re finished. Now don’t go taking that the wrong way, Dollinks, or I’ll wash your mouths out with soap.
 |
Knead dough in lightly floured bowl until smooth and elastic. |
 |
Cover lightly; let rise in a warm place, away from drafts. |
 |
Cut risen dough into four same-sized sections.
|
 |
Measuring? Review Obsessive-Compulsive Note
|
 |
Roll out and approximate, Dollinks!
|
 |
Slice into more-or-less breadstick size.
|
 |
Wash with diluted egg; sprinkle with seeds.
|
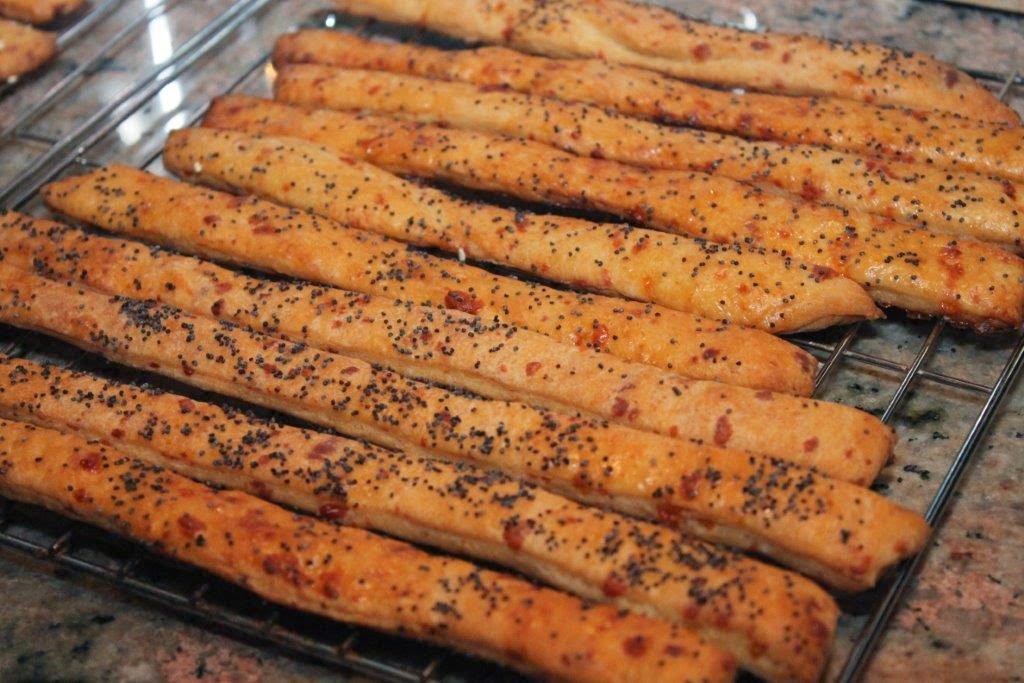 |
Baked and ready for taste-testing! Thumbs up!
|
No comments:
Post a Comment
Want to find a long-lost favorite recipe? Want to submit one of yours, or simply leave a comment? Always happy to hear from you!