Pinterested?

Wednesday, June 6, 2012

My All-Time Favorite Lasagna

I often stroll by the grocer’s freezer case and wonder: “Can any factory-made Lasagna be even half as good as mine?” Sometimes, I actually pause, eyeing the packages and thinking of the foil bake-from-frozen cartons behind the brightly colored wrappers. And then I give the freezer case a pass, thinking “Uh-uh.”

There’s a place for false modesty, but this ain’t it. My Lasagna is the best I’ve ever tasted, outside Italy. It’s true that I use canned tomatoes, and canned tomato paste. It’s true that I use dried herbs instead of lovingly growing them in my patio garden. It’s true that I don’t use freshly made Lasagna pasta. I am an everyday cook! I’m not Martha Stewart (and that, Dollinks, is a good thing).
But it’s also true that I use three distinctly different types of cheese instead of one of those packages containing a grated blend. That, and the slow-simmered meat sauce in this recipe add to its superlative blend of flavors. I drink red wine when I make this. And sometimes throw some in, though not today. I play a little Verdi. And cry, as one does with Italian operas. 

Cook at work: Sip as pot simmers!
I must caution you that this recipe is not a penny pincher. It’s moderately expensive. It takes four hours - maybe five. But my, oh, my, is it good! I made it this week in honor of my former editor’s birthday. Save this recipe for when you have the time, money, and inclination to make it, Dollinks.  I guarantee you won’t regret it! 
The measurements below are approximate. The mathematicians among you will note that one pound does not equal 500 grams; the quantity should be 454 grams. A pound works well, but countries that use metric tend to sell prepackaged noodles, cheeses, and meats in 500-gram lots, so that’s the equivalent I’ve used. Feel free to be a little loosey-goosey with this recipe. 
I promise everything will work just fine whether you use a pound, 500 grams, or the somewhat smaller 454 grams, but whichever measurement you use, stick with it throughout this recipe. I generally make what “feels right,” and that usually results in a huge batch. You be the judge: The photo of the finished product shows how much I made with the ingredient amounts stated below. 
My All-Time Favorite Lasagna:
To Prepare the Meat Sauce:
2 tsp. (10 mL) canola oil
1 c. (250 mL) chopped onions
4 garlic cloves, chopped fine
1 lb. (500 g) lean ground beef
28 oz. (796 mL) can diced tomatoes with juice
Two 5.5-oz. (156 mL) cans tomato paste
1 tsp. (5 mL) salt
1-½ tsp. (7.5 mL) oregano
1-½ tsp. (7.5 mL) basil
¼ tsp. (1.2 mL) coarsely ground pepper
1 tsp. (5 mL) onion salt
Heat oil in large, heavy saucepan on medium-low. Add onions and garlic, frying until tender and onions are translucent. Add ground beef, cooking until no pink remains. Transfer to bowl and set aside. In the same unwashed saucepan, begin simmering tomatoes, tomato paste, salt, oregano, basil, pepper, and onion salt. Return meat mixture to pot. Cover and simmer on low heat for 2-½ hr., stirring every 10 min. or so. And now you have a real Italian meat sauce! I usually make it one day ahead, allowing the flavors to deepen and blend.


This starts with onions - as many good dinners do!

Transfer cooked meat, onions, and garlic to bowl.

Simmer tomatoes, tomato paste, salt, and herbs.

Return meat mixture to pot.

Simmer 2-1/2 hr., stirring every 10 min.
To Prepare the Pasta:
One 1 lb. (500 g) pkg. dry lasagna  
Boiling, salted water, as required
Cook pasta as package directs. Don’t worry if a few break … use them, anyway. You will have a few extra, “just in case.” Rinse pasta in cold water to make its handling easier and prevent it from sticking as it cools. 
Selecting Cheeses:
Two - 1 lb. (500 g) packages ricotta cheese or dry cottage cheese curds (See Cottage Cheese Note) 
1 lb. (500 g) sliced Swiss cheese (see Swiss Cheese Note)
¾ c. grated Parmesan cheese (see Parmesan Note) 
Cottage Cheese Note: Dry cottage cheese curds can be hard to find. To make your own, wrap cheese cloth tightly around moist cottage cheese. Place in colander with a heavy weight such as a water-filled bowl over cheese, and a second bowl under colander to catch water drips. Refrigerate about an hour. The result? Dry cottage cheese curds.

Swiss Cheese Note: I use packaged Swiss sandwich slices!
Parmesan Note: For the very best flavor, grate Parmesan fresh.


Shave or grate Parmesan: Some for the lasagna ...

And some for the table.

Swiss cheese? Use everyday sandwich slices!

Dry curd cottage cheese is cheaper and goes further than the
equivalent weight of ricotta: It is delicious in this dish!
To Layer Pasta and Cheeses:
Preheat oven to 350 deg. F. Place one-third sauce in greased 4 qt. (4 L) baking dish. Cover with half pasta, placing each criss-cross. Top with half ricotta or dry curd cottage cheese, half Swiss cheese, and one-third Parmesan, being sure to take the fillings right to the edge of the casserole. Repeat, ending with sauce and topping with Parmesan. Bake, uncovered, 40 min., on the middle rack of your oven. This recipe serves 10-to-12. 


Boil and cool-rinse lasagna in small quantities.

Another batch! These require only 4 min. in boiling
water, with the rest of the cooking done in the oven.

Spread one-third meat sauce into greased casserole.

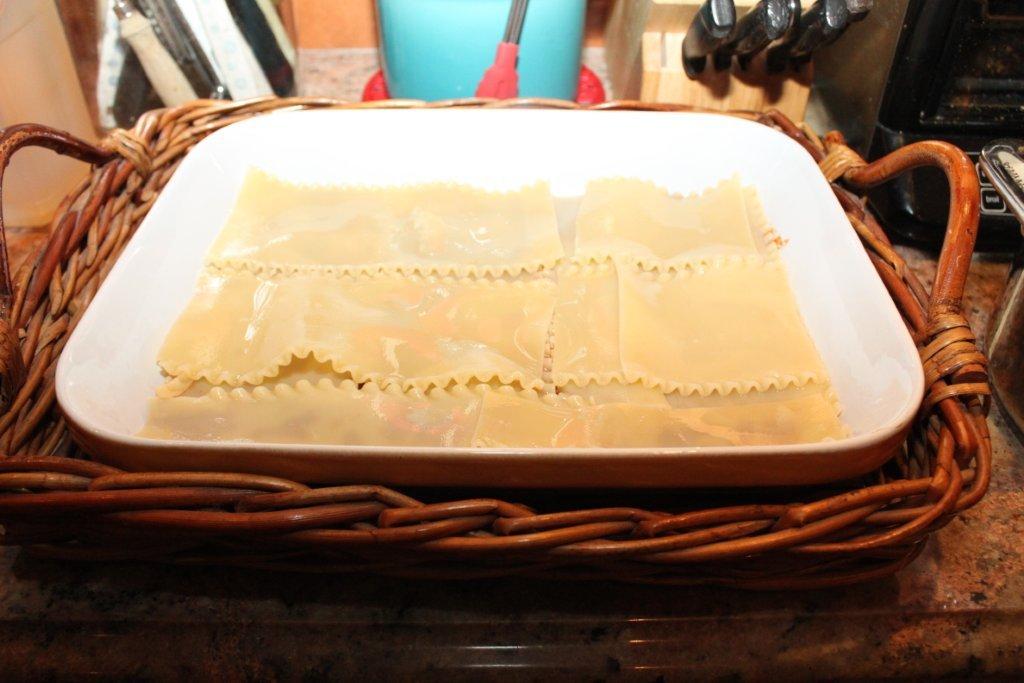
Top with criss-crossed lasagna.

Add dry curd cottage cheese.

Layer with Swiss and Parmesan cheeses.

Repeat layering meat sauce, lasagna, cheeses ...

Again: Meat sauce, lasagna, cheeses!

Ready for the table!

Tuesday, June 5, 2012

Spice Cream Cake

This wonderful recipe holds great memories for me. It comes from the 1959 Betty Crocker Picture Cookbook - the first cookbook I ever owned. Today, with more cookbooks and recipes than I can count, I always come back to this simple cake and the outstanding Easy Penuche Frosting featured below this post.
Spice Cream Cake:
2-¼ c. sifted all-purpose flour
3 tsp. baking powder
½ tsp. salt
3 tsp. cinnamon
1-½ tsp. cloves
1-½ tsp. allspice
3 large eggs
1-⅓ c. granulated sugar
1-⅓ c. whipping cream
1-½ tsp. vanilla
Grease and flour two 8- or 9-in. layer pans or a 13x9-in. pan. Sift together and set aside flour, baking powder, salt, cinnamon, cloves, and allspice. Beat eggs on high speed until thick, about 5 min. Add sugar gradually, reducing beater speed to medium. Stir in flour mixture alternately with whipping cream and vanilla, beginning and ending with flour mixture. Pour into prepared pans. Bake until cakes test done, 25-to-30 min. Cool in pans 15 min. before turning out onto cooling racks. I frosted the center of this two-layer cake with Buttercream Frosting (see blogged recipe May 4, 2012; omit the rum). I frosted the top and sides with Easy Penuche Frosting (recipe follows below this post).


Measure flour precisely: Level off measuring cup with knife

With the dry ingredients measured, break 3 eggs into bowl

Add some of spiced flour mixture to creamed eggs and sugar 

Add some of heavy cream, beating between alternated additions

A splash of vanilla ... you're done!

Distribute batter evenly among lightly greased pans


Test for doneness with a skewer or toothpick after baking
When these cakes were completely cool, I made an inward-sloping wall of chilled Buttercream Frosting around the edge of the center layer, chilled it about an hour, and then filled in the rest of the Buttercream that went between the layers. 

Once it's been chilled, this "dam" will keep the frosting
between the layers from oozing out the sides of the cake

Pat the chilled frosting dam slightly inward 

Frost middle layer within dam, chilling cake with each step

Place cooled top layer over iced bottom

You may need to wiggle cake into place until it sits evenly

I chilled the layered cake thoroughly before making the Easy Penuche Frosting that graced the top and sides.


I stored the leftover Buttercream in a sealed Ziploc bag,
rolling it flat, labeling it, and freezing it for future use.

Frozen Buttercream keeps well for months!

Buttercream rosettes contrast with Penuche Frosting

Rosettes hold birthday candles and provide a flavor burst

Every bite delicious: Our guests took home the leftovers

Easy Penuche Frosting

This frosting is outstanding, complementing spice and gingery cakes especially well. As the name says, it’s very simple to make. The recipe is another adapted from the 1959 Betty Crocker Picture Cookbook. You’ll need a candy thermometer to make it. If you don’t have one, drop a little of the sugar syrup into very cold water. If it forms thin threads, the temperature desired for this recipe is about right.
Easy Penuche Frosting:
⅓ c. butter or margarine
1 c. packed brown sugar (see Note)
¼ c. milk
1-¾-to-2 c. sifted icing sugar (“confectioners” or “powdered” sugar)
Melt butter in medium saucepan. Stir in brown sugar. Bring to a boil, stirring over medium-low heat for 2 min. Stir in ¼ c. milk. Bring to boil, stirring constantly. Remove from heat and cool to lukewarm (120 deg. F. on candy thermometer), about 8 min. Gradually stir in sifted icing sugar. Place pan in ice water, stirring until thick enough to spread. Makes enough for two 8- or 9-in. layers or one 13 x 9-in. cake. 
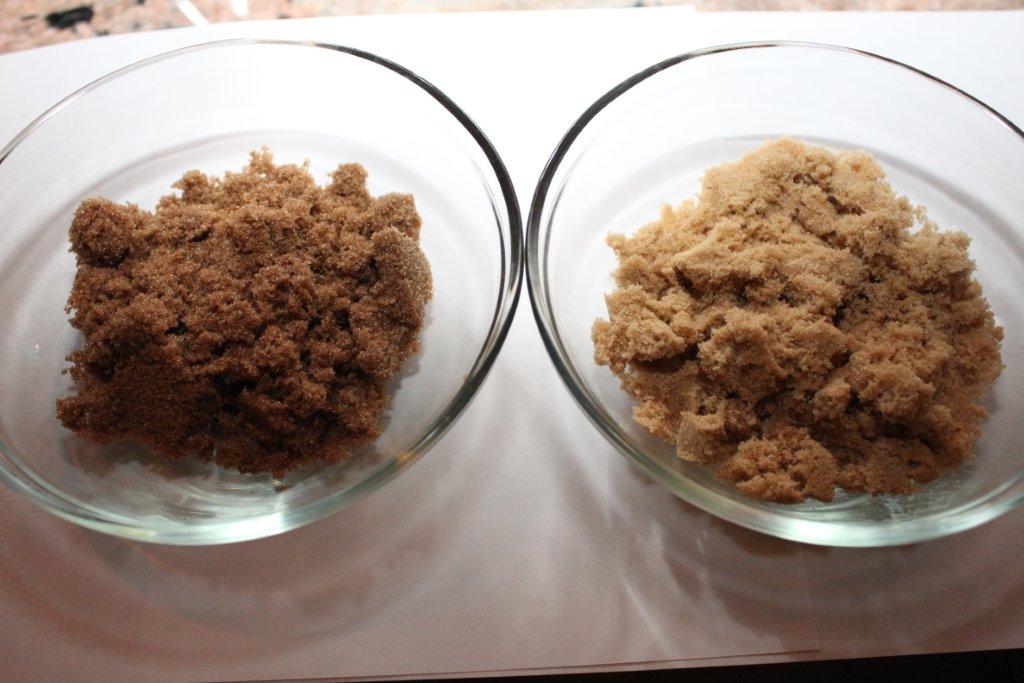
Note: Use dark brown sugar. With its richer color and stronger molasses flavor, it’s preferable to light brown sugar for this recipe.


Here are two types of brown sugar: Choose the darker one

Stir brown sugar into hot, melted butter; bring to a boil

For precision, use a candy thermometer as frosting cools

Sift icing sugar before stirring in: No lumps!

Combine well!

Do the final stirring in a bowl of ice water

Stir until frosting starts to set and each small lump is gone


Spread on top and sides of cake. Work fast! It sets fast!


This cake is destined for a birthday dinner. I still want to add Buttercream Frosting rosettes with candles poked into them, but will have to post those photos - as well as a view of the sliced Spice Cream Cake - later this evening. 

Monday, June 4, 2012

How to Shuck and Cook Corn

Dollinks: I’m testing and cooking a couple of recipes in advance of a dinner party, so will blog the results later this week. Meanwhile, you may have read a couple of wacky cooking tips circulating on the Internet, and I’m here to confirm that they actually work! The first two tips concern an easy way to shuck and an even easier way to cook corn on the cob. I was going to save this for corn season in the Time Zone and at the Latitude Where I Live, but then I realized that it may well be corn season where you live. First, the shucking! Tough job, huh? This method is excellent for small quantities of corn. Let this two-minute YouTube video show you how (I love “Clean Ears” Ken!): 


By the way, the fastest way to remove the kernels from a cob of corn is to use an electric knife. And if you hold the corn upright over a bundt or angel cake pan, the kernels will fall inside.

There are several ways to cook that corn - notably by boiling, steaming, or barbecuing it. In summer, barbecuing corn in its husk or in foil wrap with a little butter and seasoning, works very well. 
If you barbecue corn directly on the grill in its husk, soak it in cold water for 30 minutes if it’s more than a couple of days old. Freshly picked corn needs no soaking. Place the corn in its husk straight on a very hot grill. Cover to allow the corn to steam in its husk for 15-to-20 min. 

Turn occasionally, allowing the corn to adopt a smoky flavor as the husks develop grill marks. Remove from grill and cool slightly before grasping each cob with a silicone mitt as you husk and remove silks with your free hand. Serve with seasoning and butter; alternately, serve with mayonnaise, a squeeze of lime, and chipotle.

To barbecue corn without its husk, oil-spray and place, uncovered, on a medium-hot grill, turning the cobs as the kernels start to darken. Corn will be cooked through in 10-to-12 minutes. Serve as suggested above.

Now, cooking corn for a crowd. This method is referred to as “cooler corn.” You’ll find it efficient and effective. Take a standard, large cooler - not the cheap Styrofoam type or the expensive electric type - and give the innards a good wipe. Dump in as many ears of shucked corn as you need, pouring enough boiling water over the corn to cover it all. Then close the lid. Come back 30 minutes later, and your corn will be perfectly cooked. As long as the cooler’s lid remains shut, corn cooked this way will remain hot for a couple of hours. 


Cooler Corn (Internet photo; source unknown)

And now I must return to my own cooking! I’m making a tried-and-true main course and an old-fashioned cake I hope our guests will enjoy! I’d tell you what they are, but Shhhh! I don’t want to spoil the surprise!

Sunday, June 3, 2012

Penne with Tuna, Lemon, Capers, and Olives

This pasta dish has what I consider a perfect balance of flavors! I always stock penné as a staple, usually have white or light canned tuna, and generally have capers and olives in my “special” pantry, so when we need something quick and tasty, I turn to this excellent recipe. Ron and I made it on Saturday night. I hope it’s as good for you as it is was for us. No nudge-nudge, wink-wink intended. 
Penne with Tuna, Lemon, Capers, and Olives:
3 c. dry penne
2 tbsp. butter or margarine
2 tbsp. olive oil
4 large garlic cloves, chopped fine
1-½ tsp. finely grated lemon zest
¼ c. lemon juice
3 large green onions, chopped fine
2 tbsp. drained capers
10 kalamata olives, pitted and chopped (see Note)
Two 6 oz. (184 g) cans chunk white tuna, drained
Salt and coarsely ground pepper, to taste
¼ c. finely chopped fresh parsley
Grated Parmesan (preferably fresh), as required
Cook penne in heavy pot in large amount of boiling, salted water 10-to-14 min. or until tender. Meanwhile, heat butter and oil together in small, heavy saucepan over medium heat. Add garlic and sauté 2 min. Add lemon zest, lemon juice, green onions, capers, and olives, cooking 2 min.
Reduce heat to low. Add tuna, heating through and stirring gently to keep tuna intact as much as possible. Season to taste. Drain, but do not rinse penne. Return to pot. Toss hot penne with tuna mixture and parsley. Serve and sprinkle liberally with grated Parmesan. Serves 4.


Note: If you have extra kalamata olives, try the outstanding recipe for Kalamata Olive Aioli Dip posted on my blog April 16, 2011, courtesy of the Arizona Biltmore Hotel. 

These are some of the ingredients you'll need:
I like to chop and prepare everything in advance
I often use my restaurant-style grater to prepare Parmesan cheese


Chop green onions finely


Chop garlic finely, too


I use my fine-blade grater to scrape off lemon zest 

Add lemon juice to softened garlic cloves in skillet

Add lemon zest ...

A little green onion ...

Kalamata olives and capers ...

Combine gently and cook 2 min.

Stir in drained tuna

Add tuna-caper mixture to drained penne


Sprinkle in parsley

Generously sprinkle with Parmesan before serving